Commercial Resources - Wires
Wires
Access Wire Services*
Wire functions detailed throughout this user guide are located within the Wire menu options under the PAYMENTS dropdown.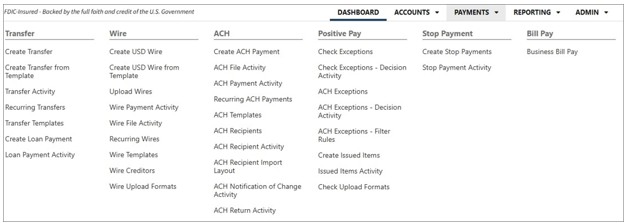
Cut-off times are located within the Cut-Off Times menu option. 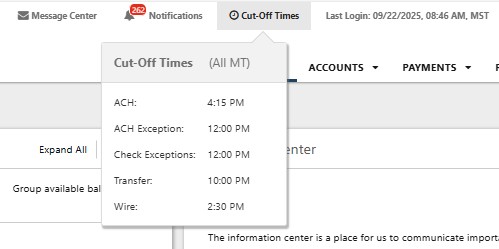
{beginAccordion}
DOMESTIC WIRES
Create a Domestic Creditor
- Select Wire Creditors from the Wire menu options under the PAYMENTS dropdown.
- Select Create New Creditor from the upper right-hand side of the screen.

- Complete all required fields (*) within the Domestic Creditor Information form, then select Review.
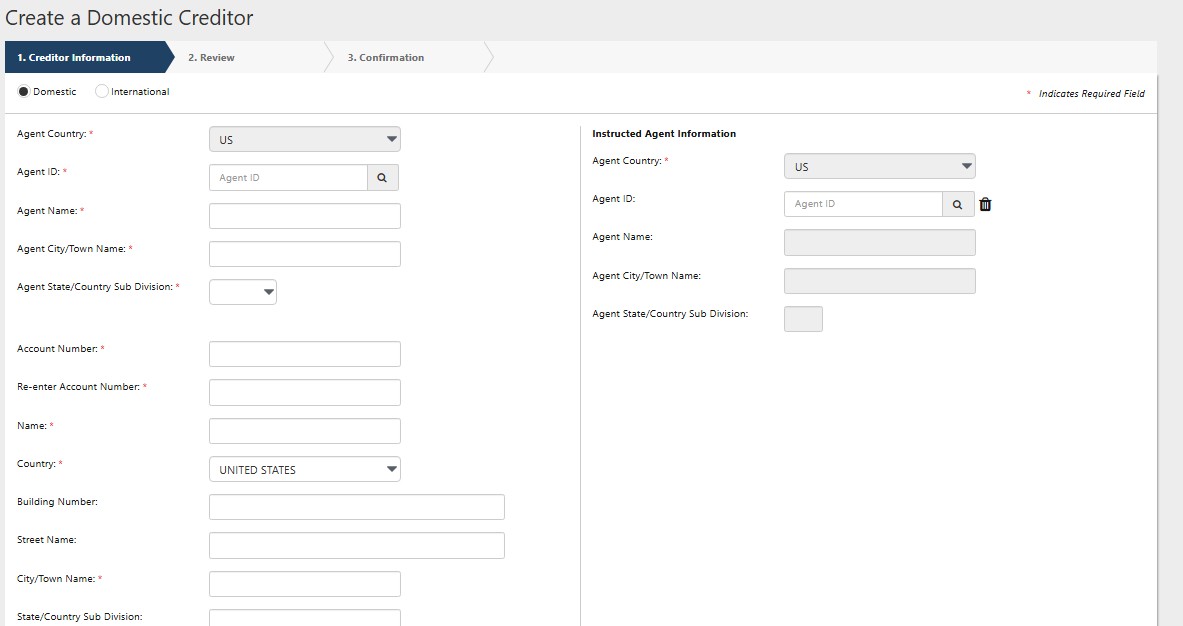
- Verify that the Creditor Information is correct, then click Confirm.

- You will receive a confirmation message after selecting Confirm. From here you can select Send a Wire to This Creditor, Create Another Creditor, or View Wire Creditors. You may also download or print the confirmation page.
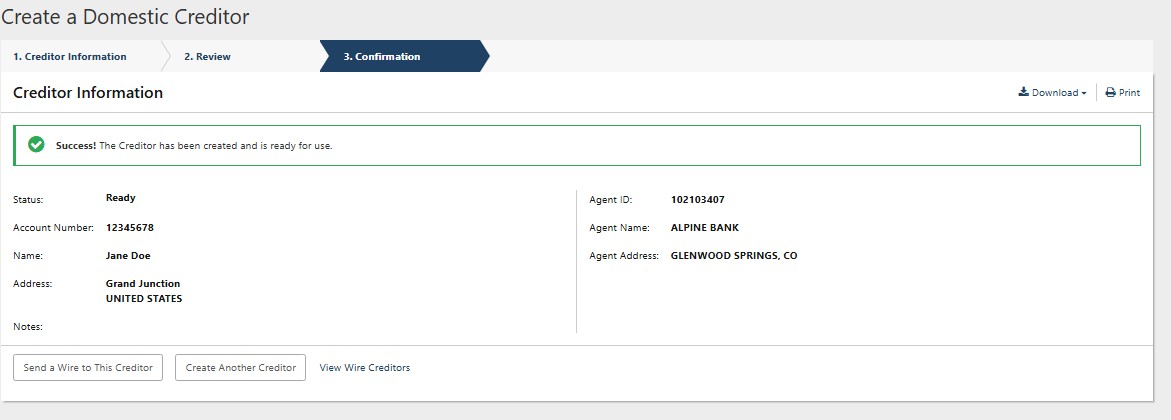
NOTE: As you add Creditors, they will be compiled into a directory. By clicking on View Wire Creditors, you may search through existing Creditors or create new Creditors. You may also download or print the list of Creditors or initiate a new wire transfer.
Create USD Wire
- Select Create USD Wire from the Wire menu options under the PAYMENTS dropdown.
- Complete all required fields (*) within the Creditor Information form, then select Review.
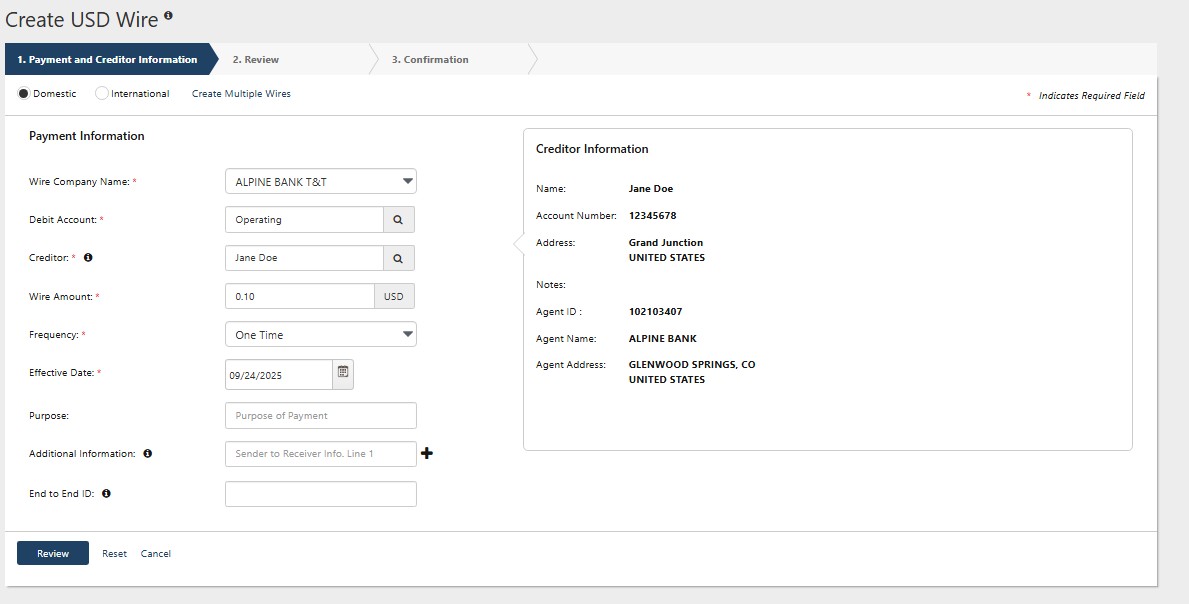
- Carefully review the wire information. Then click Confirm.
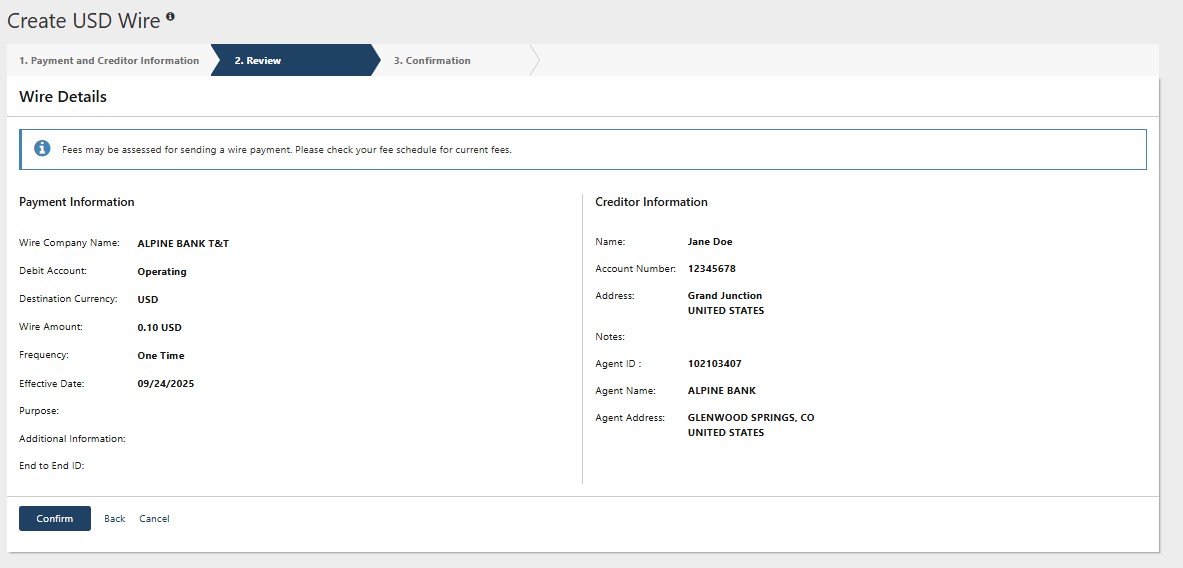
- You will receive a confirmation message that the wire was successfully created.
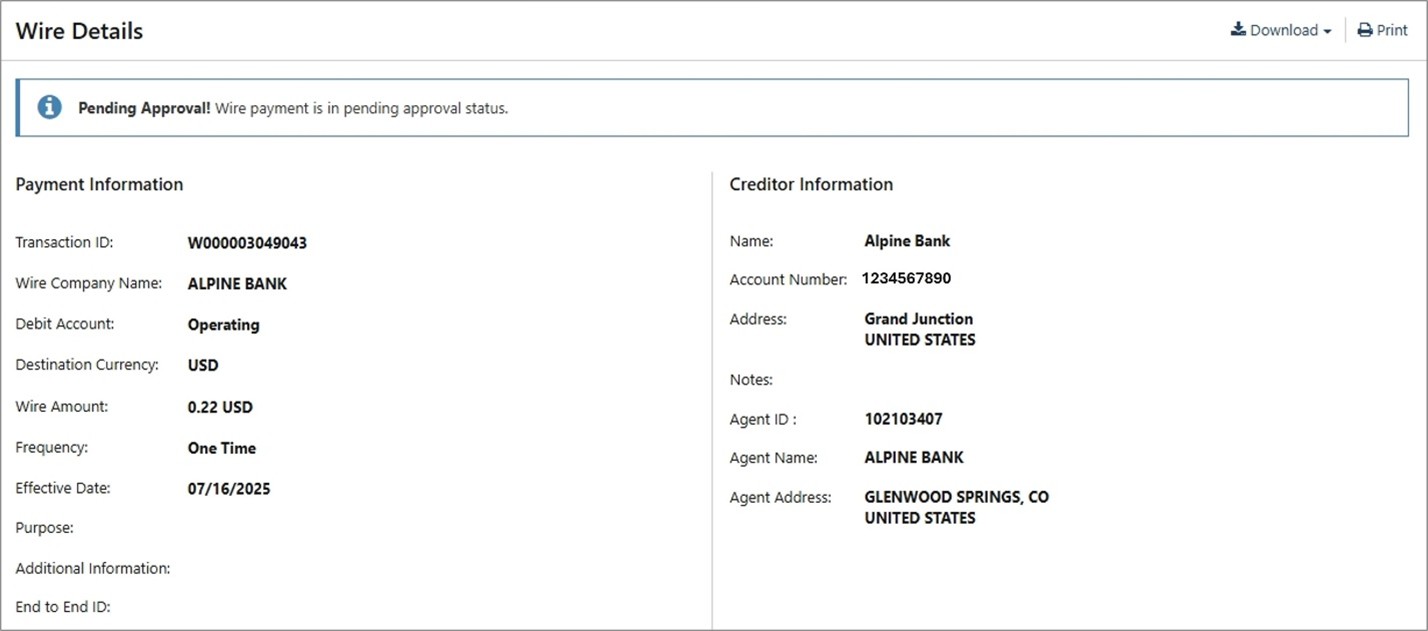
NOTE: If you are set up with Dual Control for wire transfer requests, one user will need to create the wire and then the wire will be placed in an approval status. From here, a second user will need to transmit the wire as the approver before it is sent to the Creditor.
Create Wire Template
- Select Wire Templates from the Wire menu options under the PAYMENTS dropdown.
- Select Create New Template from the upper right side of the screen.
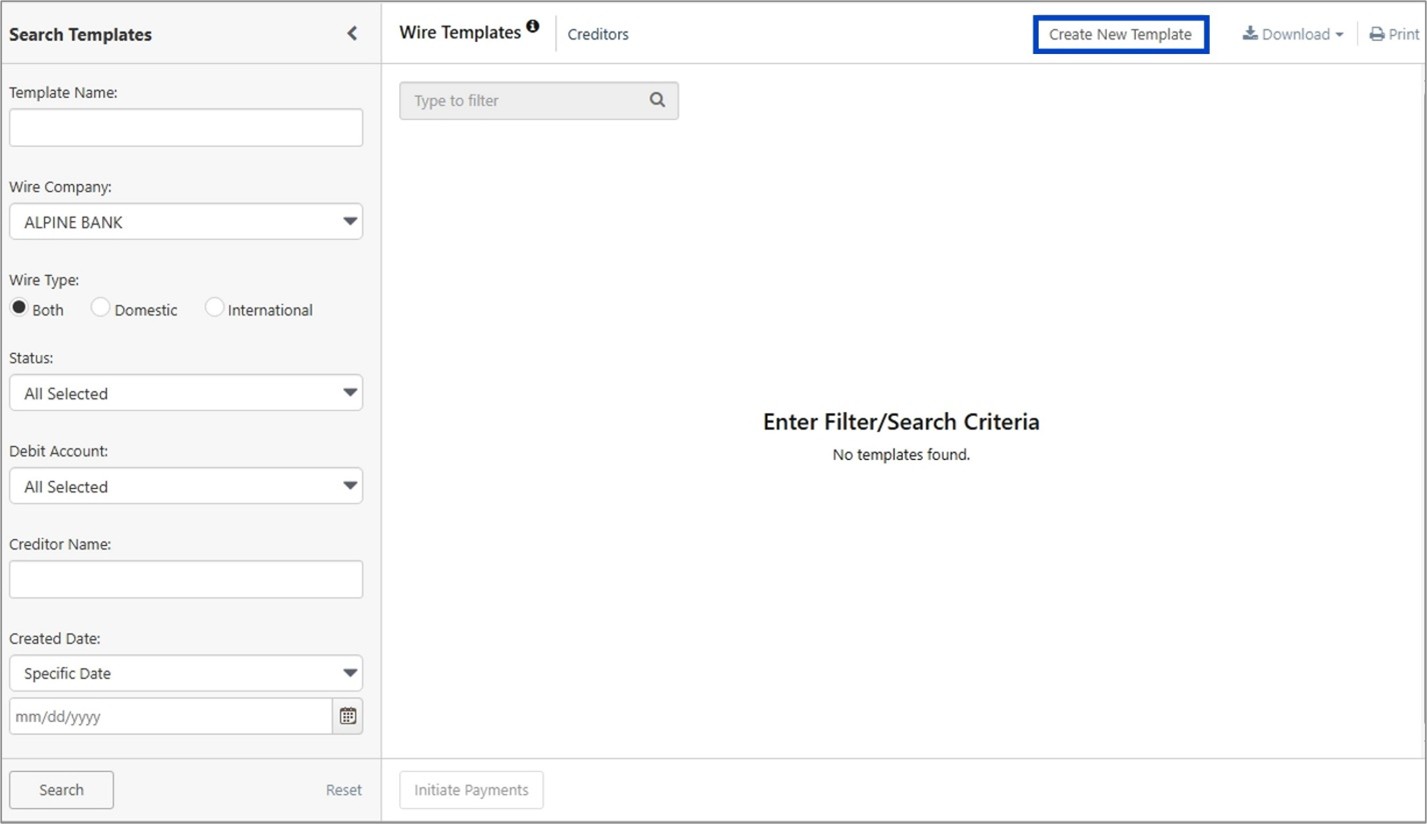
- Complete all required fields (*) within the Payment Information form, then select Review.
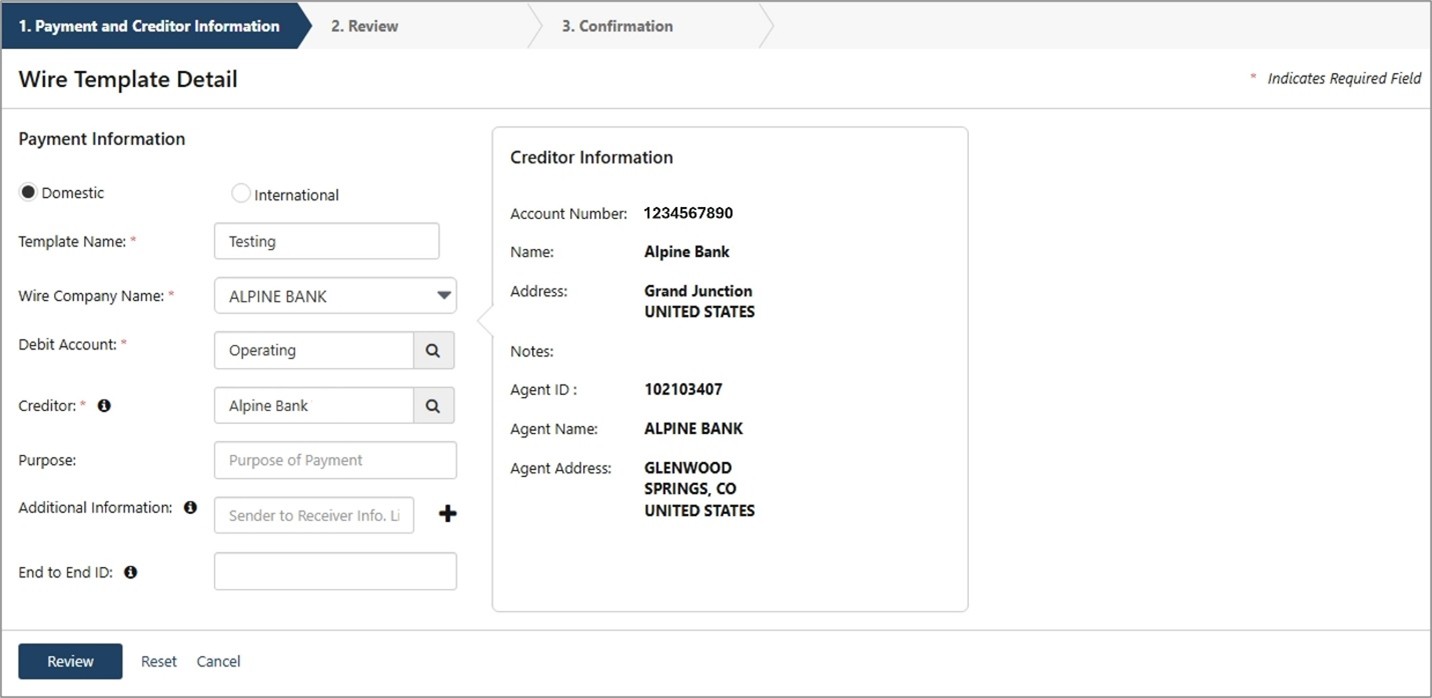
- Carefully review the wire template information. Then click Confirm.
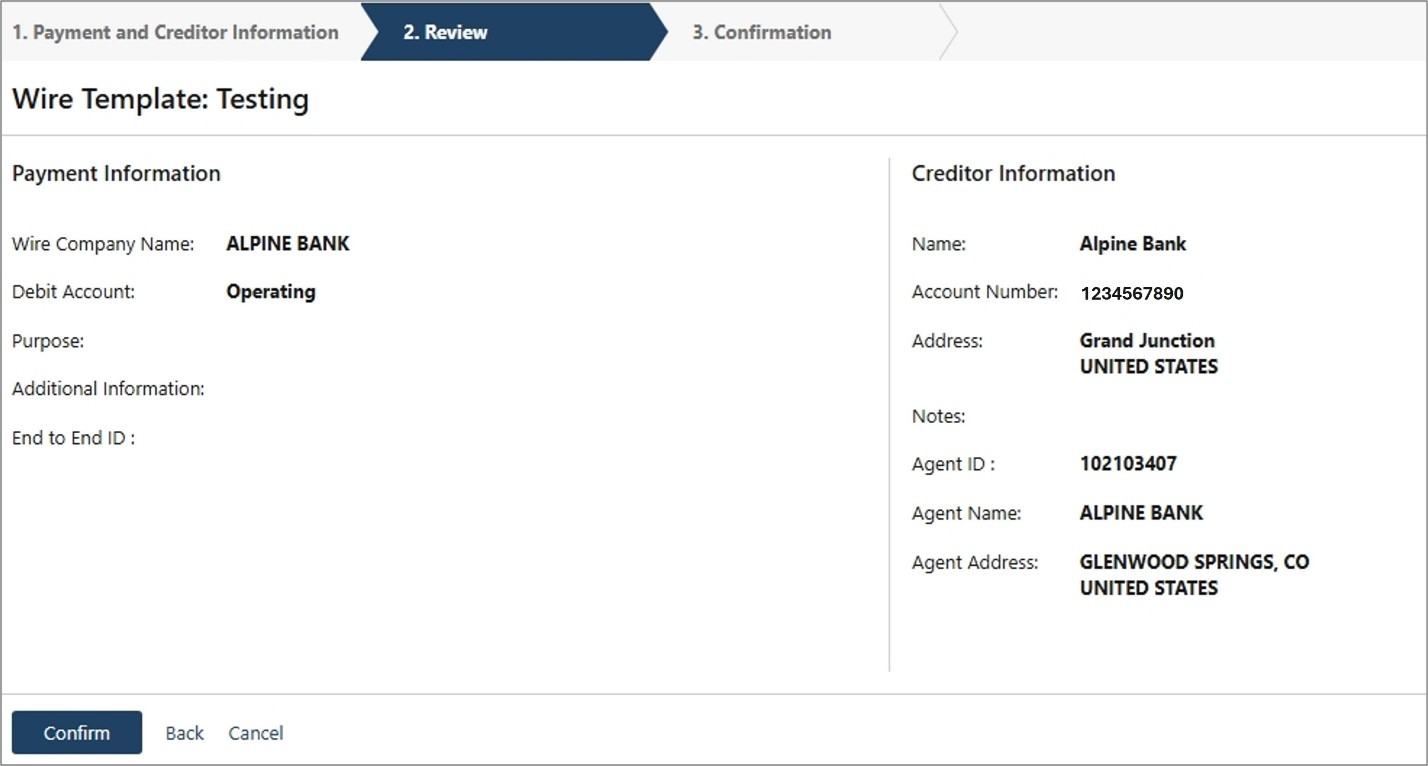
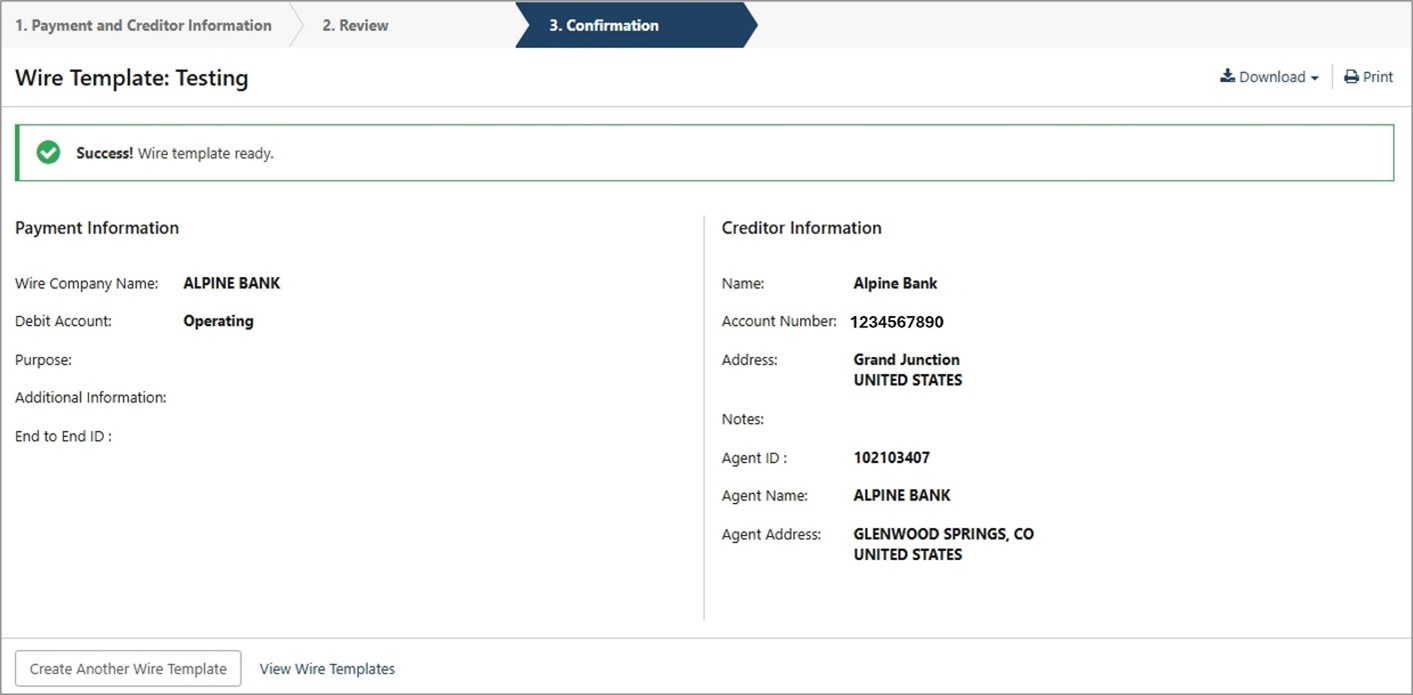
- You will receive a confirmation message after selecting Confirm. From here you can select to Create Another Wire Template or View Wire Templates. You may also download or print the confirmation page.
INTERNATIONAL WIRES
Create International Creditor
- Select Wire Creditors from the Wire menu options under the PAYMENTS dropdown.
- Select Create New Creditor from the upper right-hand side of the screen.

- Complete all required fields (*) within the International Creditor Information and Intermediary Agent Information form, then select Review.
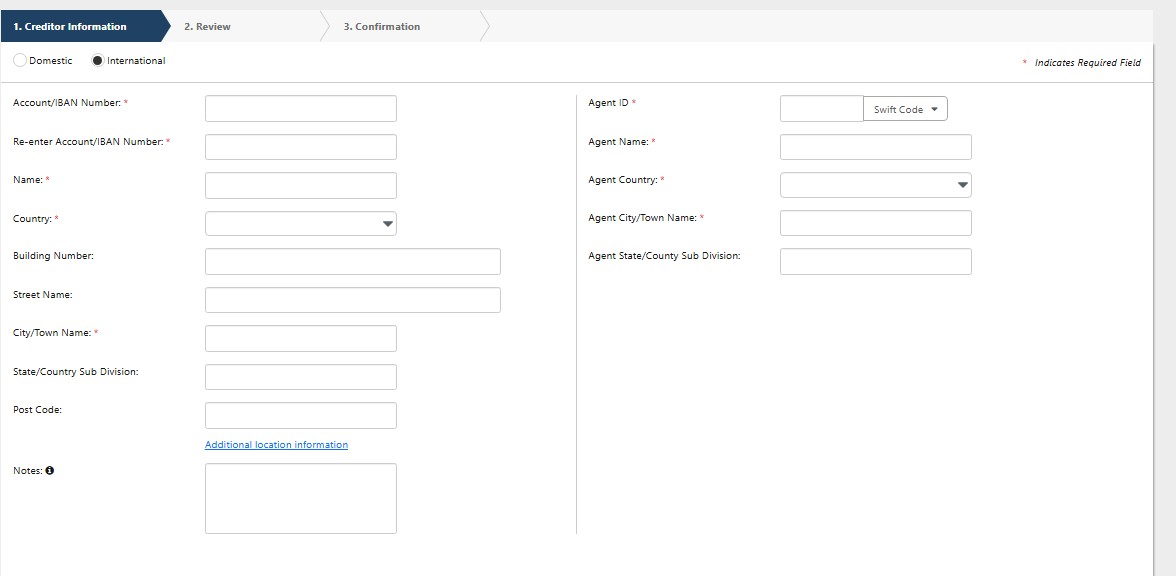
- Verify that the Creditor Information is correct, then click Confirm.
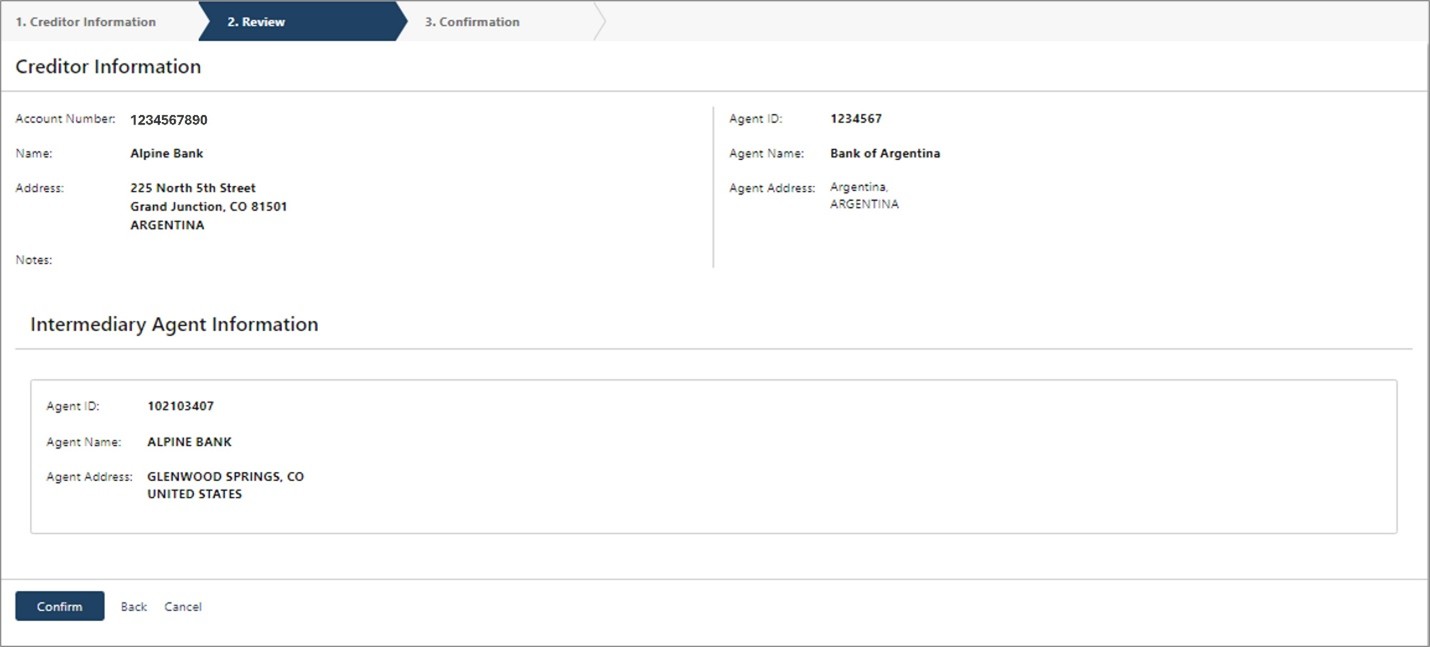
- You will receive a confirmation message after selecting Confirm. From here you can select Send a Wire to This Creditor, Create Another Creditor, or View Wire Creditors. You may also download or print the confirmation page.
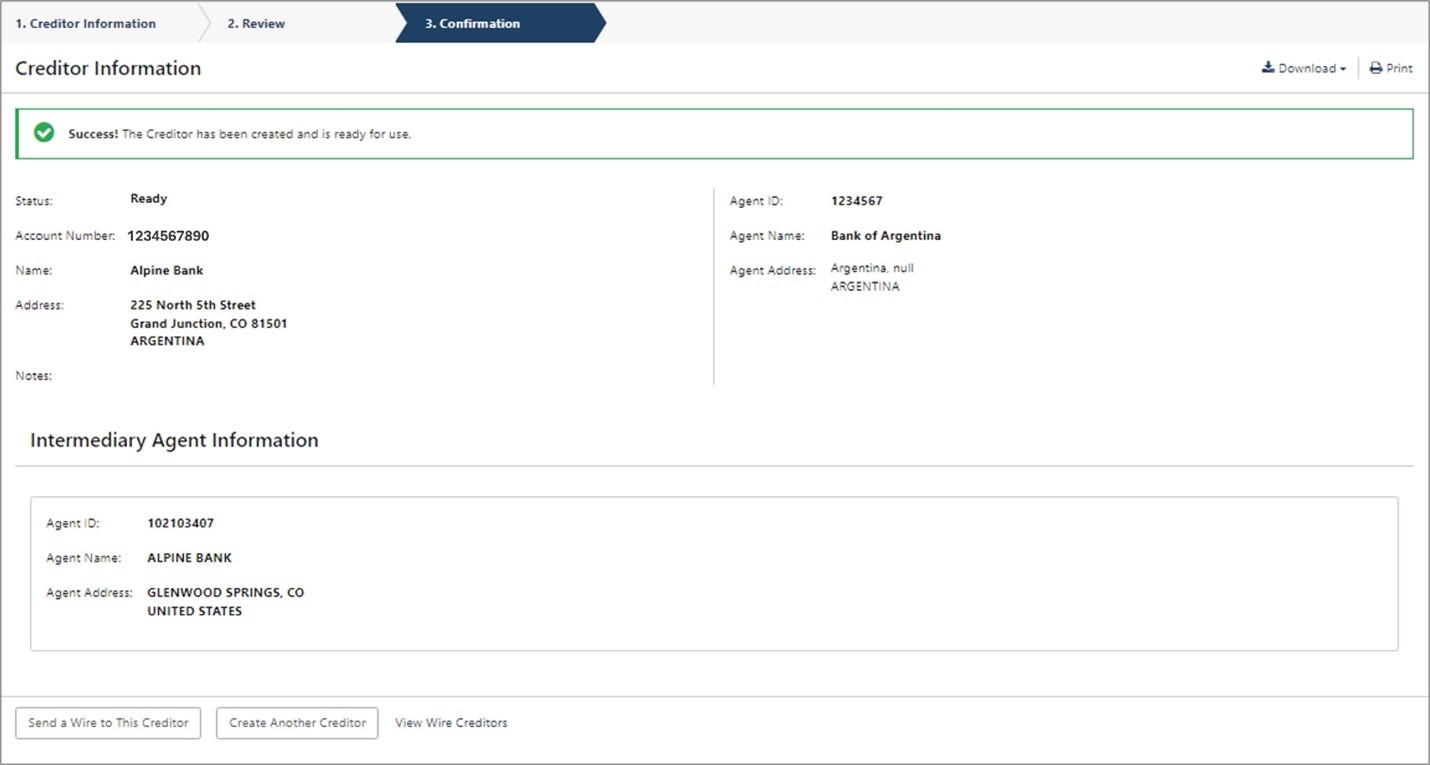
NOTE: As you add Creditors, they will be compiled into a directory. By clicking on View Wire Creditors, you may search through existing Creditors or create new Creditors. You may also download or print the list of Creditors or initiate a new wire transfer.
Create International USD Wire
- Select Create USD Wire from the Wire menu options under the PAYMENTS dropdown.
- Select International in the top left hand corner.

- Complete all required fields (*) within the Creditor Information form, then select Review.
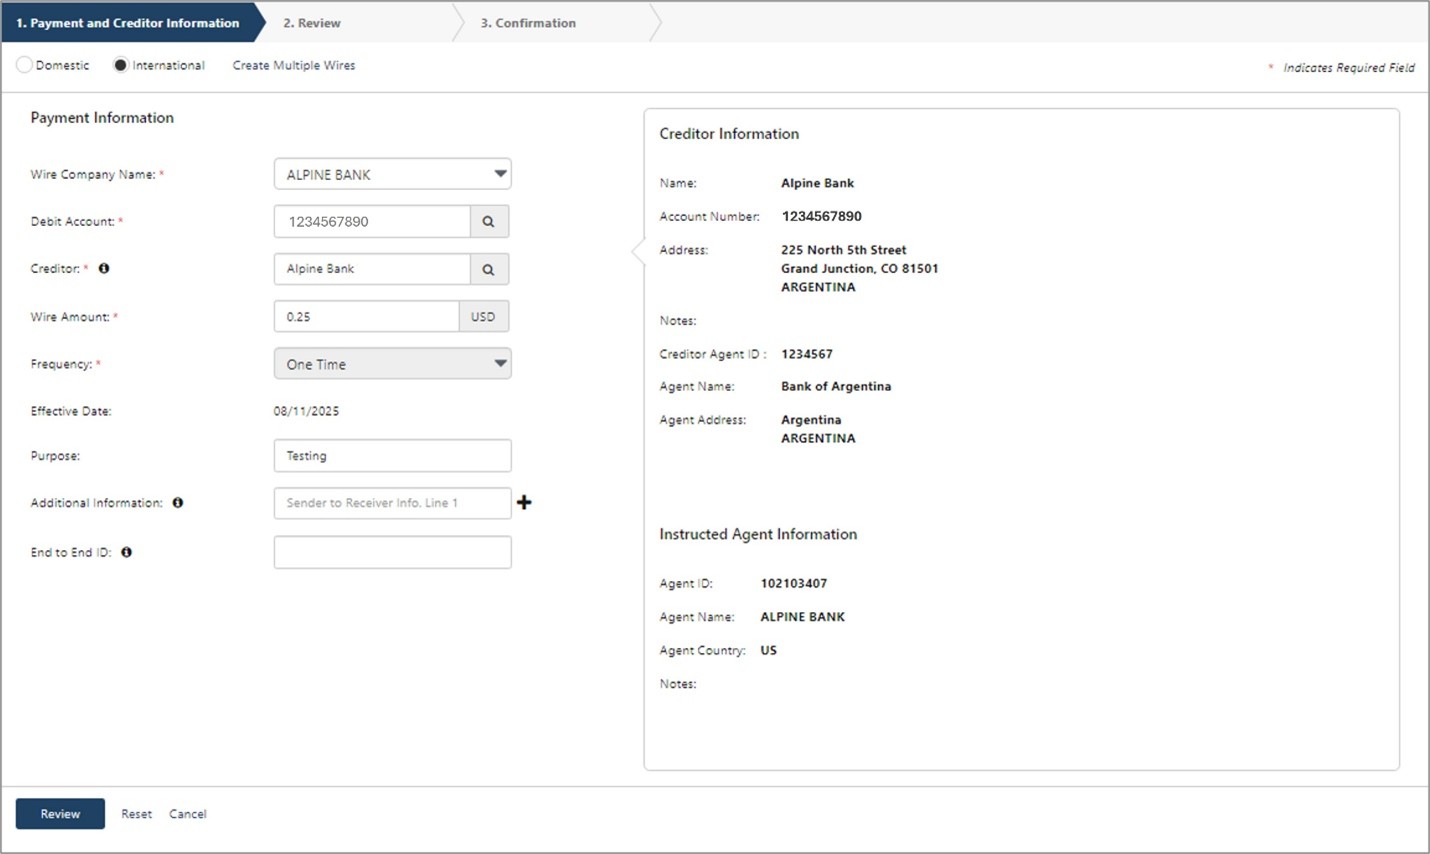
- Carefully review the wire information. Then click Confirm.
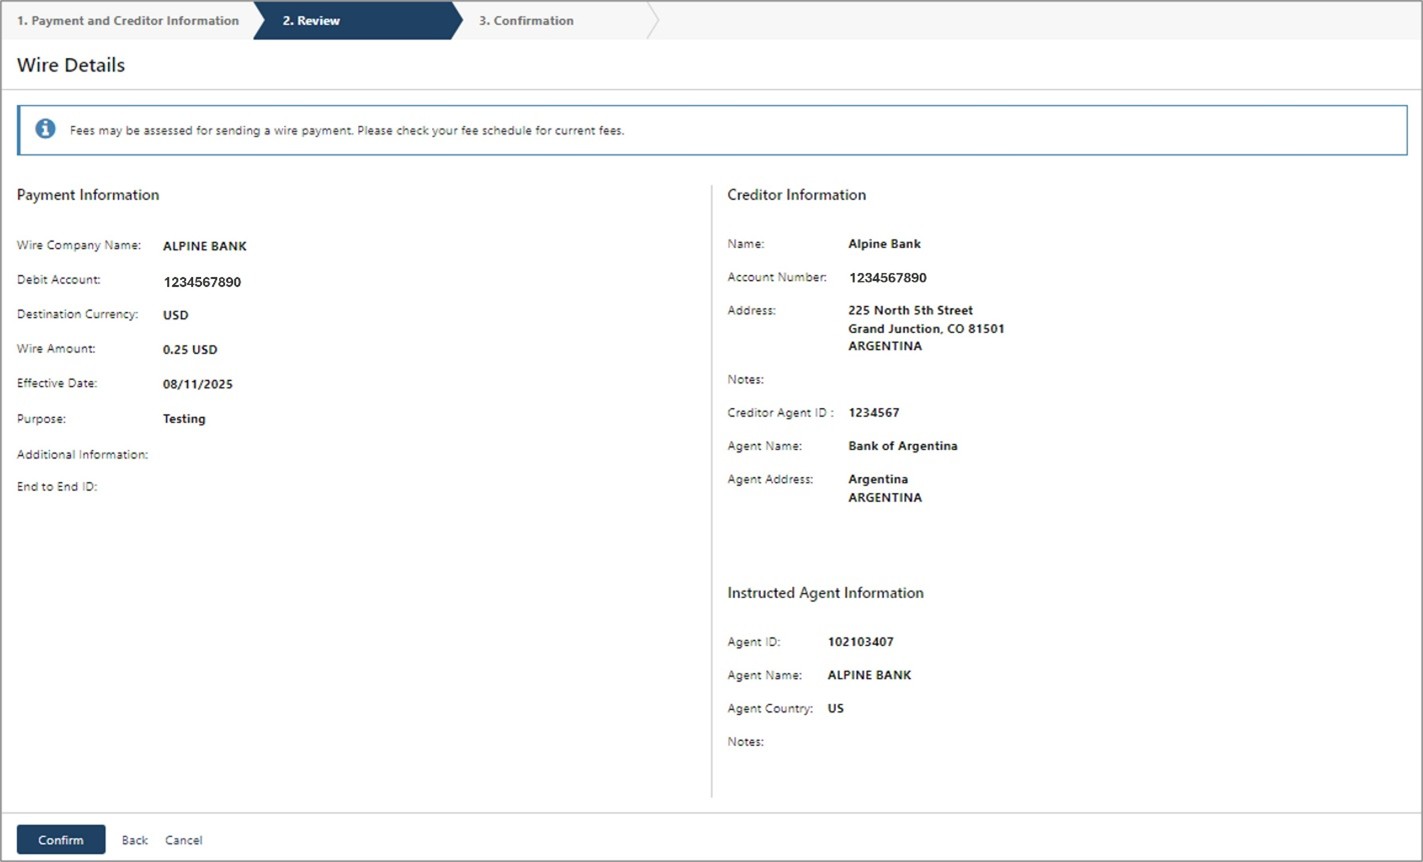
- You will receive a confirmation message that the wire was successfully created.
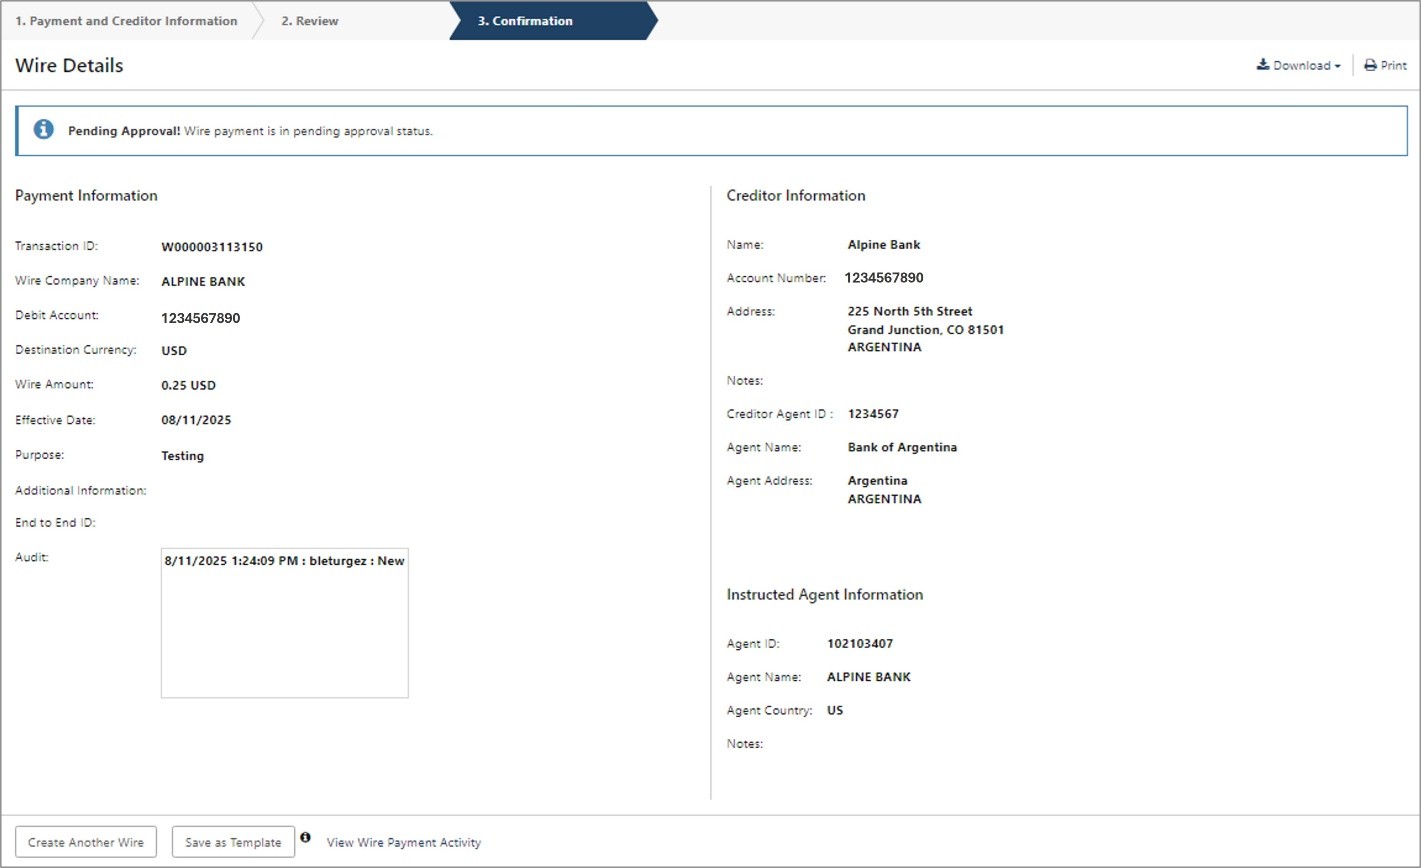
NOTE: If you are set up with Dual Control for wire transfer requests, one user will need to create the wire and then the wire will be placed in an approval status. From here, a second user will need to transmit the wire as the approver before it is sent to the Creditor.
Create International Wire Template
- Select Wire Templates from the Wire menu options under the PAYMENTS dropdown.
- Select Create New Template from the upper right side of the screen.

- Select International and complete all required fields (*) within the Payment Information form, then select Review.
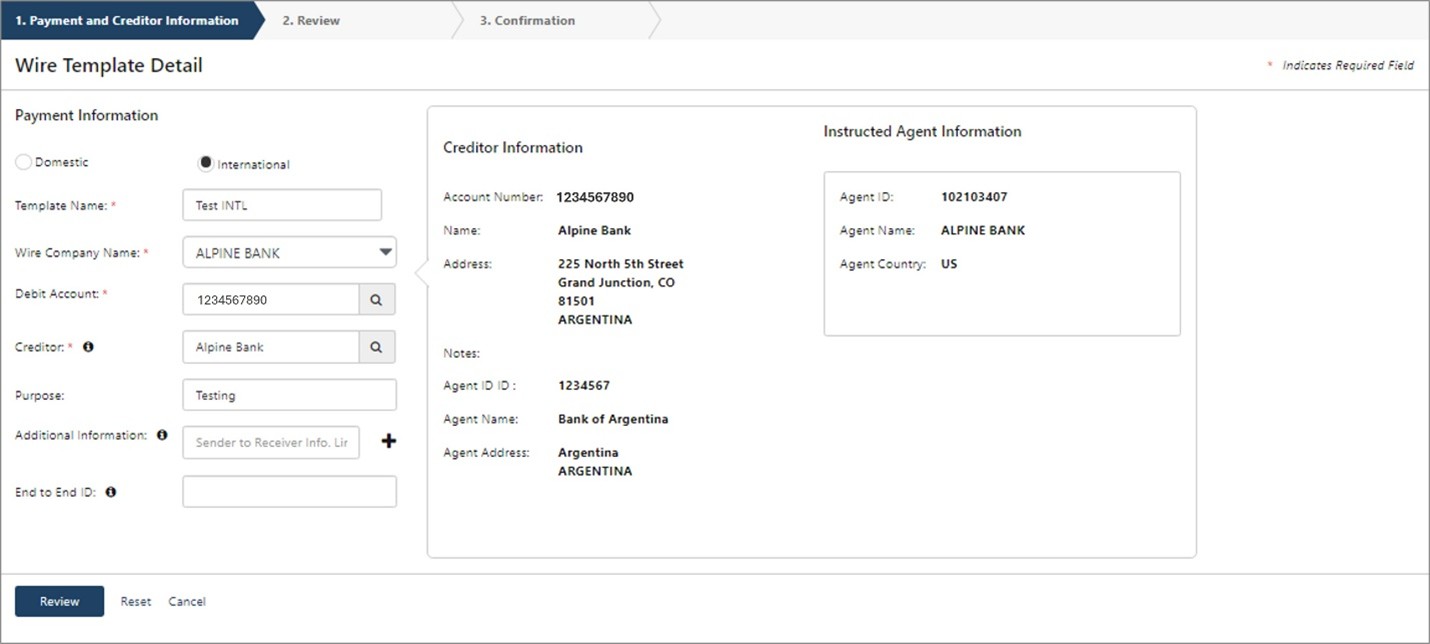
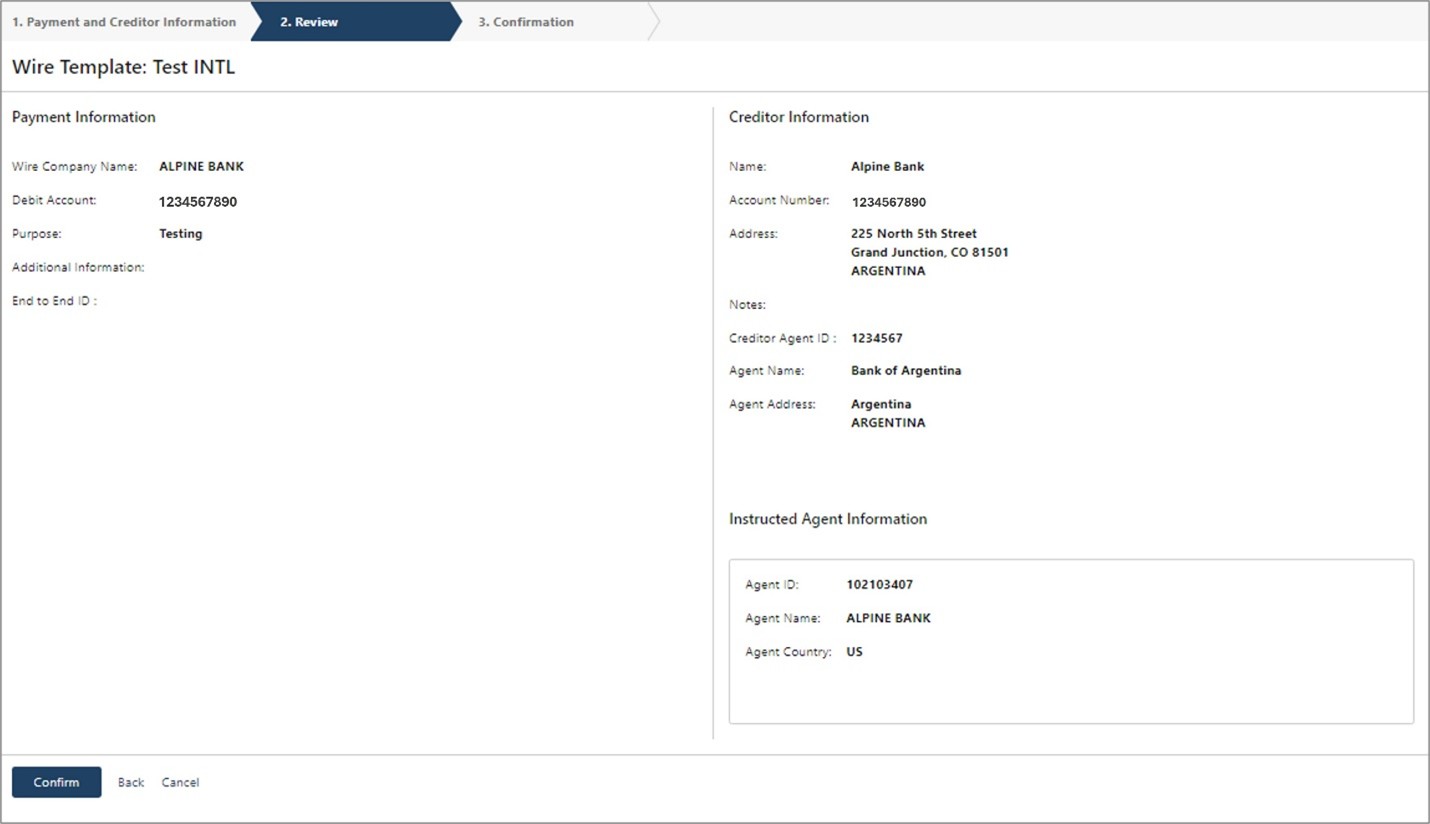
- Carefully review the wire template information. Then click Confirm.
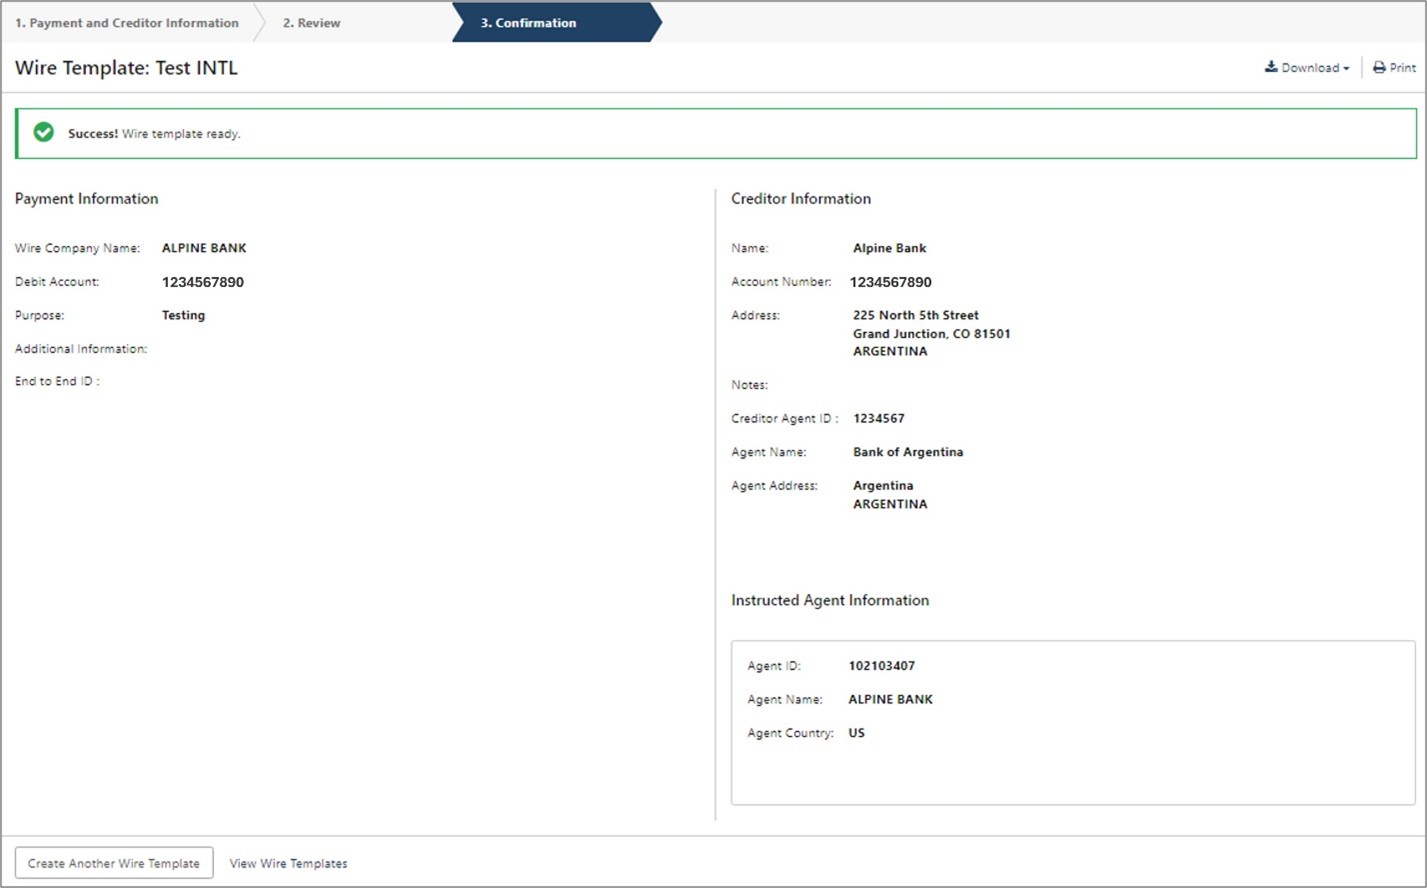
- You will receive a confirmation message after selecting Confirm. From here you can select to Create Another Wire Template or View Wire Templates. You may also download or print the confirmation page.
{endAccordion}
*Online wires are intended for business customers only, require additional agreements, and are subject to underwriting and approval. Wire processing is subject to bank business days: Monday through Friday, excluding federal holidays and cut-off time requirements. Certain transaction fees and limitations apply. Please refer to the product enrollment form and the terms and conditions.

