Resources
{beginAccordion}
Online/Mobile Banking Guides
{openTab}
Frequently Asked Questions
- Find helpful answers to questions pertaining to online banking, our mobile app and more here.
{endAccordion}
Customer Support
Online Banking Support
(800) 551-6098
ACH*
{beginAccordion}
Access ACH Services
Access your ACH services by completing the following steps:
- Go to www.alpinebank.com and select Online Logins.
- Enter your username and password and Login.
- From the menu options on the left side, select Business.
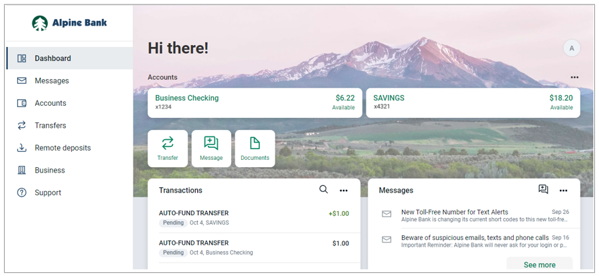
NOTE: The Business menu option is not available through the Alpine Mobile® app.
- You will be prompted to enter the secure token code found in your VIP Access app, or on your physical token.
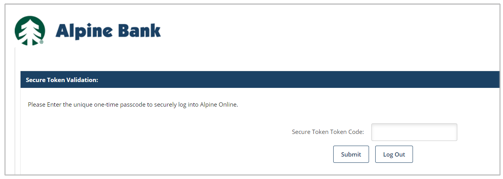
- After completing any applicable verification steps, select Cash Manager, then ACH.
Create ACH Batch
There are three ways to create an ACH batch: 1) Manual Entry, 2) Uploading a NACHA File and 3) Uploading a CSV File. Here’s a video tutorial and step-by-step guides to create and initiate an ACH batch:
Business Online ACH- Video Guide
Manual Entry
If you do not have many transactions in your ACH batch, entering them manually might be a good option. Complete the following steps to enter ACH transactions manually:
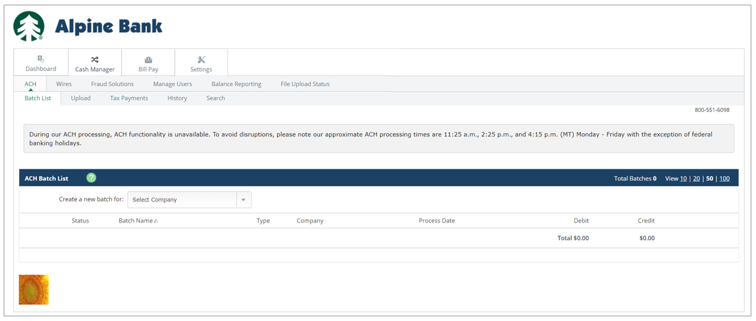
- In the Business services page, click Cash Manager, then ACH and Batch List.
- Select the ACH Company from the Create a new batch for drop-down menu.
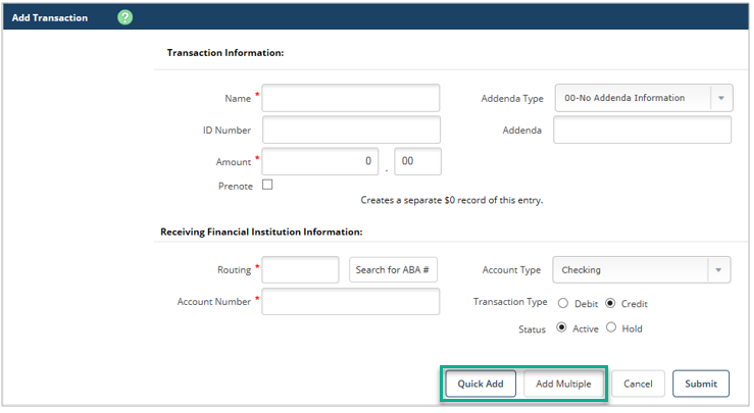
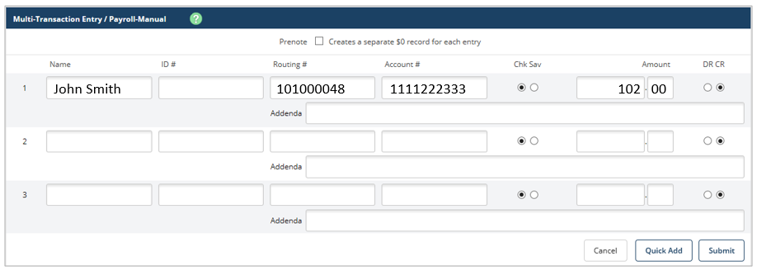
- Add one transaction at a time by inputting the individual’s information and click Quick Add or select Add Multiple, and enter the information. Then click Submit.
Add Multiple Transactions screen:
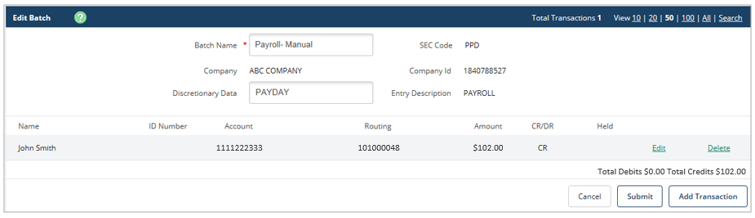
- Verify the information on the Edit Batch screen, and Submit.
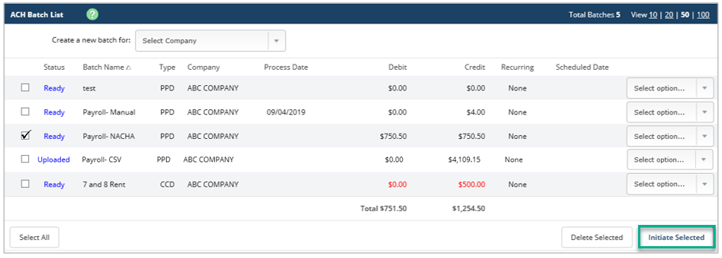
- Your new batch will be listed in the ACH Batch List. Checkmark the batch or batches you would like to initiate, and click Initiate Selected.
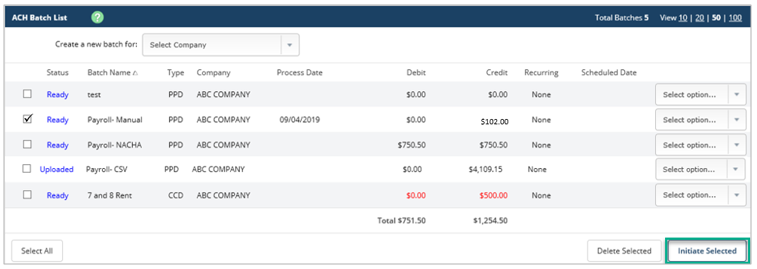 NOTE: You may also select Initiate from the Select option drop-down menu to the right of the batch.
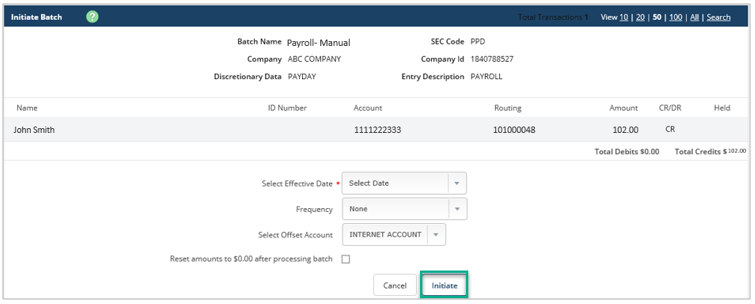
- Select the appropriate effective date and offset account, then select Initiate. (Note: If your ACH Origination service is set up with Dual Custody, a second Authorized User will need to Initiate the batch or batches that you created.)

NOTE: The Effective Date must be at least two business days* in advance for credits and one business day* in advance for debits.
Uploading a NACHA File
NACHA files are created using accounting software and may be uploaded and initiated through business online banking, using the steps below.
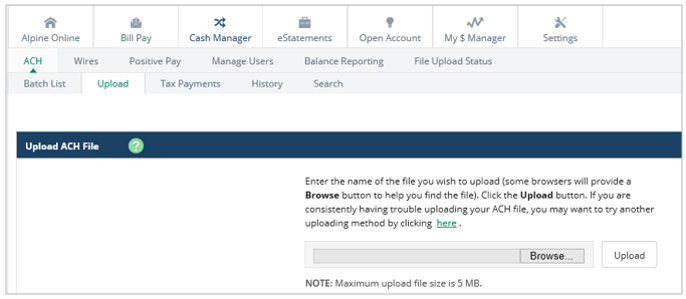
- From the Business services page, under Cash Manager, select ACH and Upload. Click Browse, select the NACHA File and Upload the file.
- The File Upload Status will show the NACHA file and its status. If Queued, click Refresh List until it shows a status of Uploaded.

- Your new batch will be listed in the ACH Batch List. Checkmark the batch or batches you would like to initiate, and click Initiate Selected.
NOTE: You may also select Initiate from the Select option drop-down menu to the right of the batch.
- Select the appropriate effective date and offset account, then select Initiate. Note: If your ACH Origination service is set up with Dual Custody, a second Authorized User will need to Initiate the batch or batches that you created.
NOTE: The Effective Date must be at least two business days* in advance for credits and one business day* in advance for debits.
Uploading a CSV File
CSV files are created from your accounting software, or in Excel, and saved in a CSV (Comma delimited) format. Before you can upload a CSV file, make sure that the Import Layout matches the columns in the CSV file, then you can upload it into your Cash Manager ACH system.
- The Excel spreadsheet should include vital information in separate columns. For example, the individual’s name, their ID (optional), routing number, account number, amount, the type of account they have (For example: S=Savings, D=Deposit/Checking), and if you are debiting or crediting them.
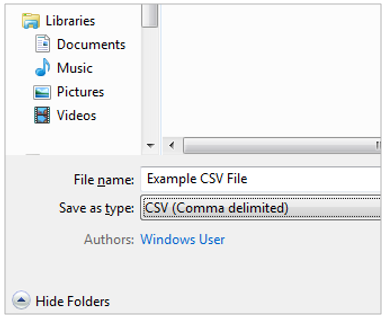
- To save the spreadsheet as a CSV file, go to File, then Save As. Name the file and use the Save as type drop-down menu to select CSV (Comma Delimited). Click Save.
- Your Import Layout must match your file so all information pulls over correctly. To set up your layout, go to the Business services page, select Cash Manager, then ACH and Import Layout.
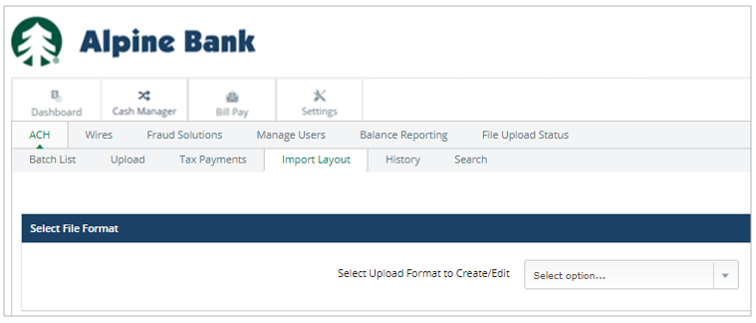
- Select CSV File Layout from the Select Upload Format to Create/Edit drop-down menu.

- Match the column numbers in the Excel spreadsheet with each type of information. (For example: Column A=1, Column B=2, Column C=3, etc.) Once you have completed your CSV File Layout to match your file, click Save.
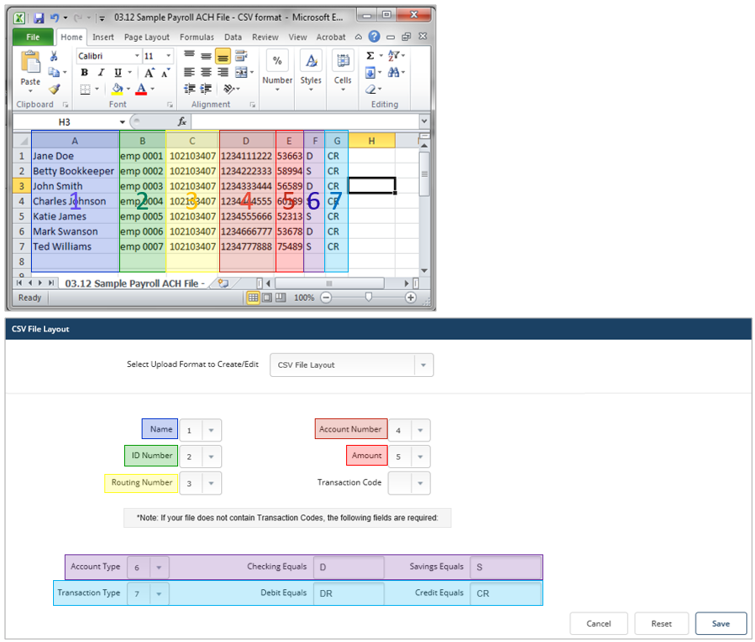
NOTE: If you do not have transaction codes in your file, enter the account type and transaction type. You must then enter the corresponding abbreviation. For example: Checking=D, Debit=DR, etc.
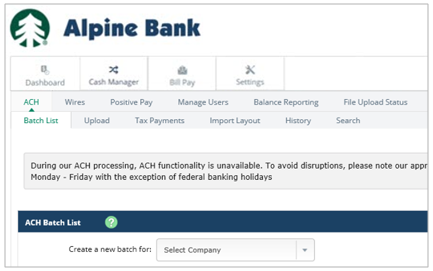
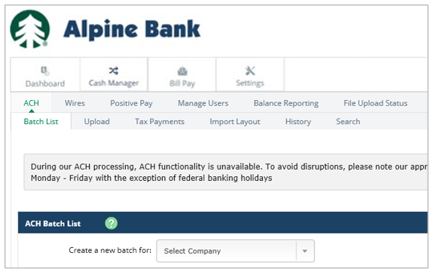
- From the Cash Manager tab, select ACH and Batch List. Use the Create a new batch for drop-down menu to select the company name.
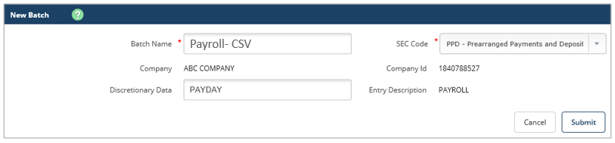
- On the New Batch page, enter in the Batch Name and click Submit.
- To import a CSV File, select Import Transaction at the bottom of the page.
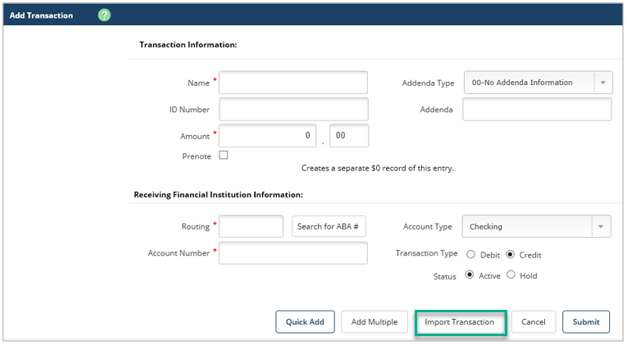
- Select CSV File from the Import File Type drop-down menu. Browse your computer for the CSV file, and select Import.

- You will then see the File Upload Status. Click Refresh until the status of the file is Uploaded.

- Your new batch will be listed in the ACH Batch List. Checkmark the batch or batches you would like to initiate, and click Initiate Selected.
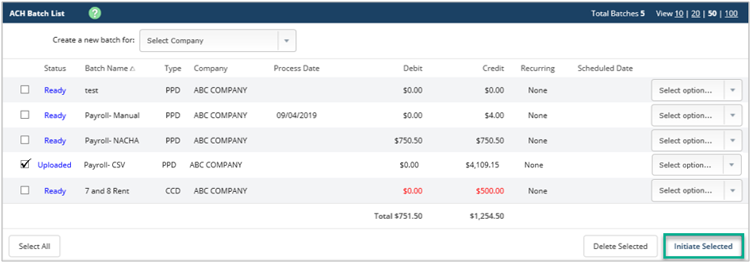
NOTE: You may also select Initiate from the Select option… drop- down menu to the right of the batch.
- Select the appropriate effective date and offset account, then select Initiate. (Note: If your ACH Origination service is set up with Dual Custody, a second Authorized User will need to Initiate the batch that you created.)
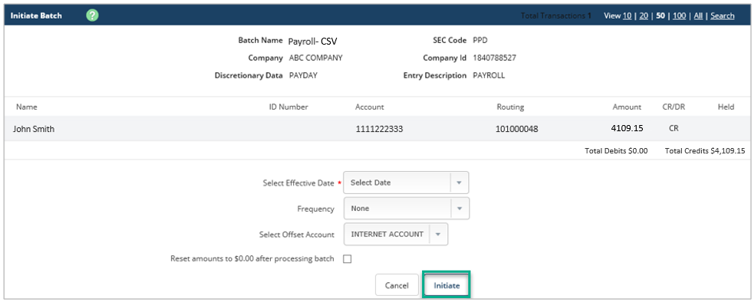
Note: The Effective Date must be at least two business days* in advance for credits and one business day* in advance for debits.
{endAccordion}
* ACH services are intended for business customers only, require additional agreements, and are subject to underwriting and approval. ACH processing is subject to bank business days: Monday through Friday, excluding federal holidays, and cut-off time requirements. Certain transaction fees and limitations apply. Please refer to the product enrollment form and the terms and conditions.