Resources
{beginAccordion}
Online/Mobile Banking Guides
{openTab}
Frequently Asked Questions
- Find helpful answers to questions pertaining to online banking, our mobile app and more here.
{endAccordion}
Customer Support
Online Banking Support
(800) 551-6098
Positive Pay
Positive Pay is a fraud detection tool that matches ACH and/or check transactions presented for payment against previously authorized transactions by your company, to help you prevent fraud before it occurs.
{beginAccordion}
Access Positive Pay
Access Positive Pay by completing the following steps:
- Visit www.alpinebank.com and select Online Logins.
- Enter your username and password and Login.
- From the menu options on the left side, select Business.
NOTE: The Business menu option is not available through the Alpine Mobile® app.
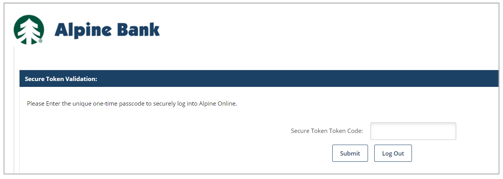
- If your ID is enabled with a secure token, you will be prompted to enter the secure token code found in your VIP Access app, or on your physical token.
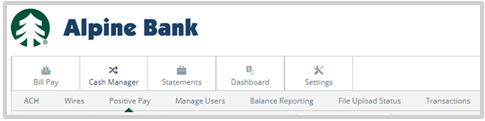
- After completing any applicable verification steps, select Cash Manager and Positive Pay.
ACH Positive Pay
ACH Positive Pay offers additional protection from unauthorized ACH transactions. This online tool provides the ability to monitor and control which ACH transactions (debits and credits) post to your account(s).
ACH transactions sent from authorized ACH companies will go through without the need for review. Any companies that are not on the approved ACH list will be presented as an exception, and must be reviewed by the person who decides if they should be paid or returned.
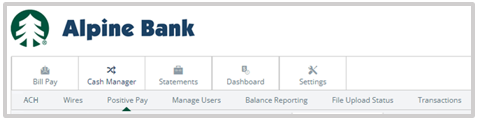
- To review and work ACH Exceptions go to Cash Manager, Positive Pay and then Work ACH Exceptions.
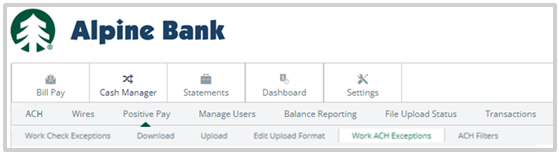
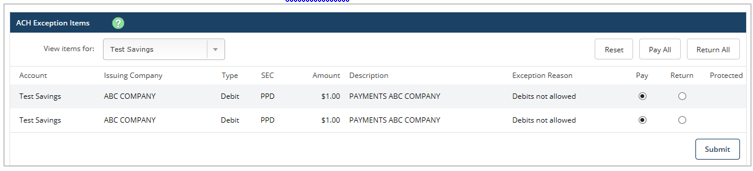
- The View Items for: drop-down menu allows you to select the applicable account to view exceptions. Review any exception items, then select to either Pay or Return them, and Submit.
NOTE: ACH exceptions must be reviewed each business day between 6:00 a.m. and 12:00 p.m. Mountain Time. If the items are not reviewed by 12:00 p.m., they will be returned.
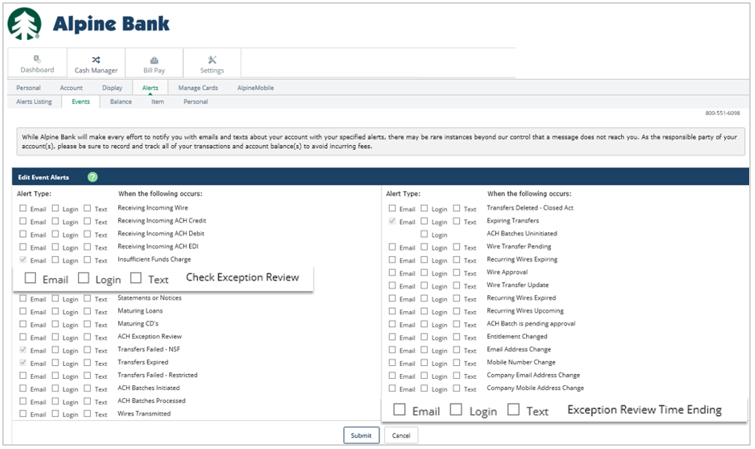
Helpful Hint:
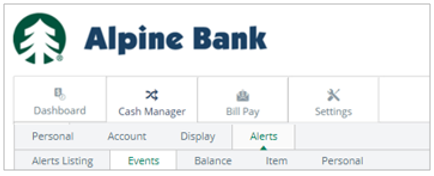
To receive an alert when you have a Positive Pay exception, go to Settings, Alerts and Events. You may choose to receive the ACH Exception Review and/or Exception Review Time Ending alerts by email, login or text. Then, Submit.
Check Positive Pay
Check Positive Pay can help prevent unknown check transactions from hitting your account by allowing you to upload a list of issued checks that the Bank uses to automatically verify checks as they post to your business account. Check transactions that are not on your issued checks list will be available online for you to approve or return.
- Your business is responsible for uploading or entering your issued checks so that the system can recognize which check items are exceptions. To upload/enter your checks go to Cash Manager and Positive Pay. There are three ways to enter/upload your check items. They are: 1) Manual Entry, 2) CSV File and 3) Fixed Position File. Here are the steps for each type:
- For Manual Entry, under Positive Pay click Upload. Choose the account next to Upload File For and select Manual Entry from the Upload File Type drop-down menu.
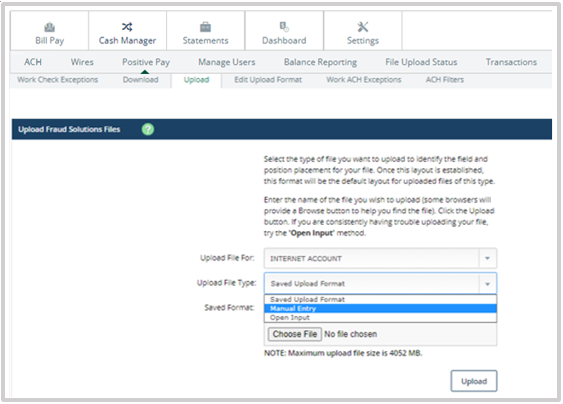
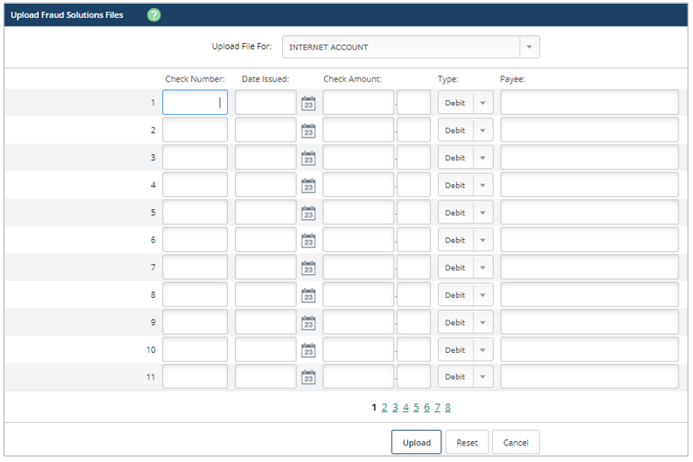
Enter the check number, issue date, amount and payee name for each check item being issued. Then, select Upload.
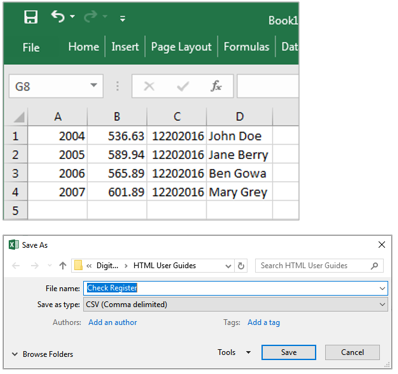
- For CSV File, note that CSV files are created as Excel spreadsheets. Include the check number, amount, issue date and payee in separate columns.
Save the file as a CSV (Comma delimited) file.
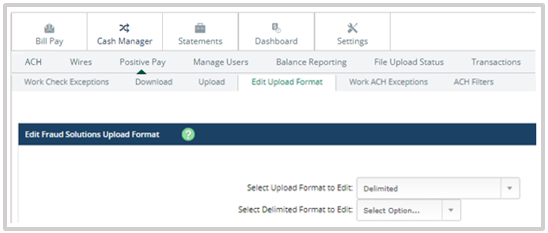
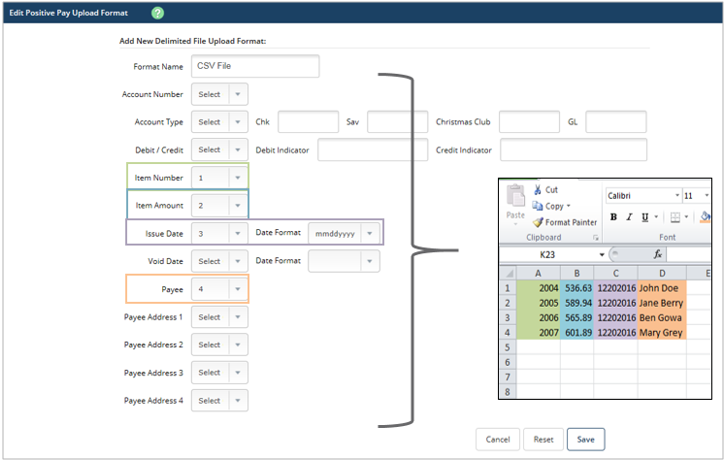
Edit Upload Format - The upload format must match the CSV file format, so that all information pulls over correctly. To set your Upload Format, go to Positive Pay and Edit Upload Format. Choose Delimited from the Select Upload Format to Edit drop-down menu. Select or add a new format name from the drop-down menu next to Select Delimited Format to Edit.
Match the column numbers from the CSV file with each type of information. (Example shown below: Column A=1, Column B=2, Column C=3, etc.) Save the upload format.
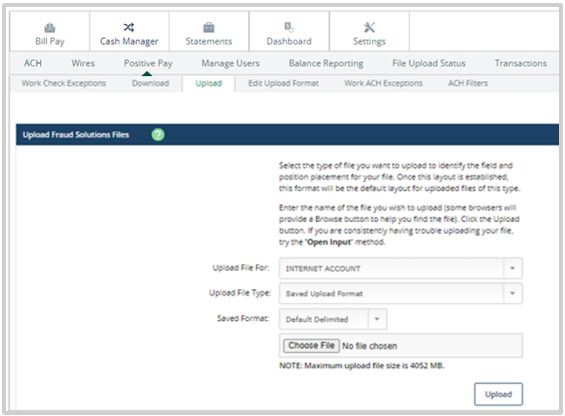
Upload - under Positive Pay select Upload. Choose the account, select Saved Upload Format, and the saved format name that you created. Then browse for the file and select Upload.
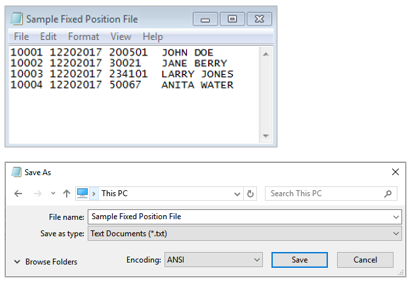
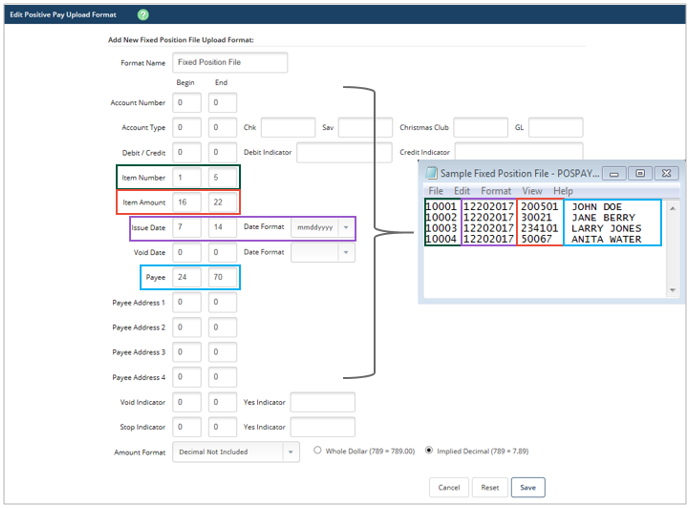
- For Fixed Position File, these are typically created in accounting software and are text documents. To upload a Fixed Position File into Positive Pay, complete the following steps:
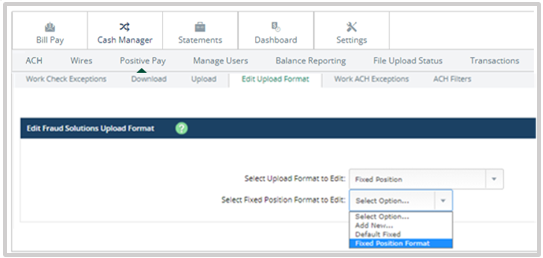
Edit Upload Format - The upload format must match the fixed position file format so all information pulls over correctly.
To create your upload format, click Edit Upload Format and choose Fixed Position from the Select Upload Format to Edit drop-down menu. Next to Select Fixed Position Format to Edit, choose Fixed Position Format.
Enter the character range for each type of information.
(Example shown below: Item Number = characters 1-5, Item Amount = characters 16-22, Issue Date = characters 7-14, etc.)
When the formatting is correct, Save the Upload Format.
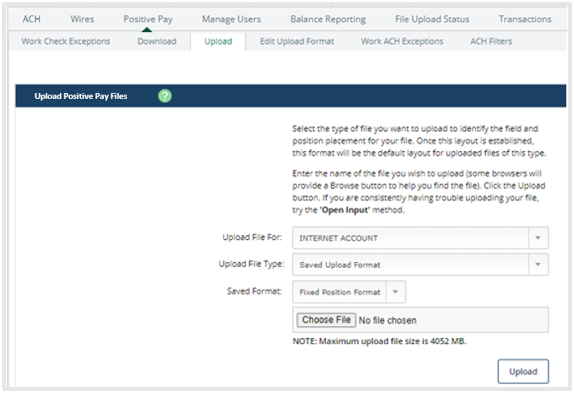
Upload - Go to Positive Pay and Upload. Choose the account, select Saved Upload Format, and the format name you created. Then browse for the file and select Upload.
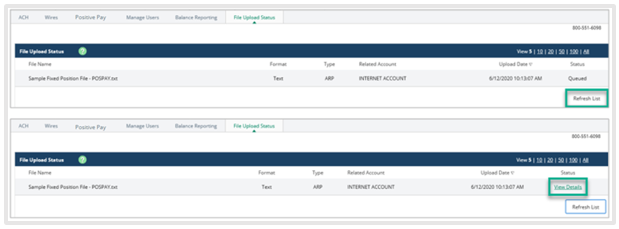
- Upload Status - Once your checks have been uploaded, the file upload status will display as Queued. Click Refresh List until View Details is displayed. This indicates the checks were uploaded successfully. Then, select View Details.
- Review and approve the list of uploaded checks. If all the information is correct, click Approve.

NOTE: To allow sufficient time to process the file, please upload it at least one day in advance of when you plan to distribute your checks.
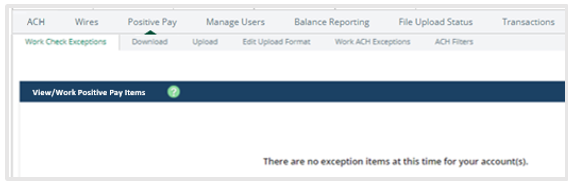
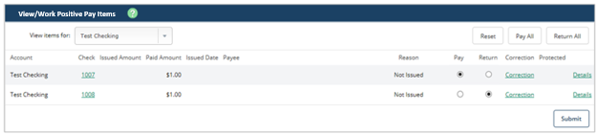
- To review exception items, click Cash Manager, Positive Pay and Work Check Exceptions. If you see a message stating there are no items to work, no further action is needed.
If there are exception item(s) listed, this means a check that was not in your upload file is trying to post to your account, or something doesn’t match. Select Details to view more information on the check, or click on the check number to view the check image.
Choose Pay or Return for each exception item, then click Submit.
NOTE: Exception items must be reviewed between 6:00 AM and 12:00 PM Mountain Time. If the items are not reviewed by 12:00 PM, they will be returned.
Helpful Hint:
To receive an alert when you have a Positive Pay exception, go to Settings, Alerts and Events. You may choose to receive the Check Exception Review and/or Exception Review Time Ending alerts by email, login or text. Then, Submit.