Resources
{beginAccordion}
Online Banking Guides
{openTab}
{endAccordion}
Customer Support
Commercial Banking Support
(833) 325-7902
Check Positive Pay
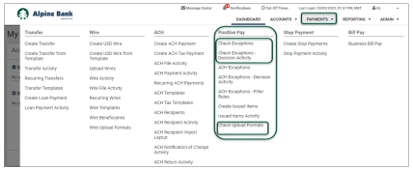
Check Positive Pay functions detailed throughout this user guide are available within the Positive Pay menu under the PAYMENTS dropdown menu.
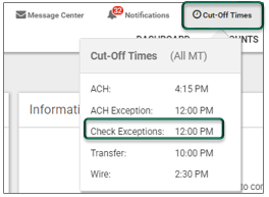
Cut off times are available within the Cut-Off Times menu:
{beginAccordion}
CREATE ISSUED ITEMS
Your business is responsible for uploading or entering your issued checks so that the system can recognize which check items are exceptions. Select Create Issued Items from the Positive Pay menu under the PAYMENTS dropdown. There are two ways to enter/upload your check items: 1) manual entry and 2) file upload (CSV or fixed position).
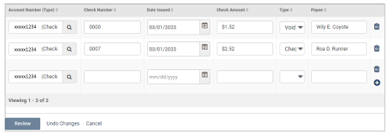
Manual Entry:
- Ensure that Enter Checks is selected.
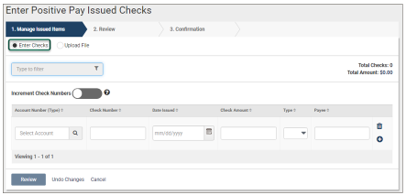
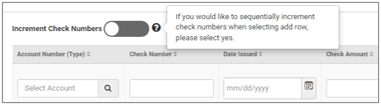
- If the check range you’re entering advances sequentially, toggle the Increment Check Numbers option to yes. It will change from gray to blue.
- Select the Account Number that the check was written from.
- Complete all pertinent information for each issued check and select Review.
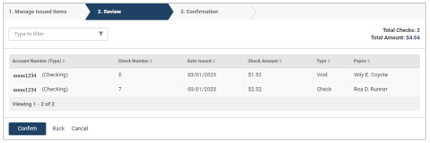
- Verify that the issued check items are correct, then select Confirm.
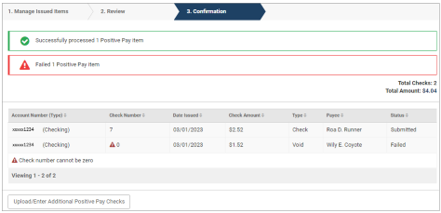
- You will receive a confirmation message after selecting Confirm. From here you can review any issued item errors as well as Upload/Enter Additional Positive Pay Checks.
FILE UPLOAD
File Upload Format: For CSV files, note that files are created as Excel spreadsheets. Include the check number, amount, issue date, and payee in separate columns and save the file as CSV (comma-separated values, or comma delimited).
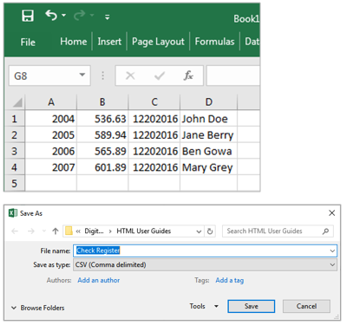
Check Upload Format: The upload format must match the CSV file format so that all information pulls over correctly.
- To set your upload format, select Check Upload Format from the Positive Pay menu under the PAYMENTS dropdown.
- Select Create New Format and ensure you are on the Delimited upload format.
- Match the column numbers of the CSV file with each type of information (example shown below) and complete all additional required fields (*).
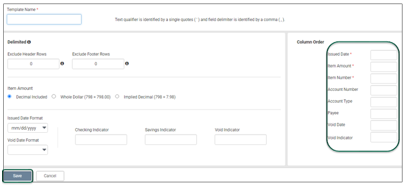
- Select Save once upload format is set.
-
-
-
-
-
Upload:
- Ensure that Upload File is selected.
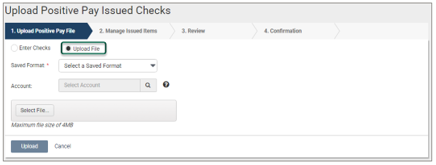
- Select your file upload format from the Saved Format dropdown.
- Select the Account number that you are uploading the file for, then browse for the file and select Upload. Then, select Review.
- Verify that all issued checks are correct, then click Confirm. You will receive a confirmation message. From here you can review any issued item errors as well as Upload/Enter Additional Positive Pay Checks.
CHECK EXCEPTIONS
Check exception items must be reviewed each business day between 6:00 AM and 12:00 PM Mountain Time. If the items are not reviewed by 12:00 PM, they will be returned.
- To review exception items, select Check Exceptions from the Positive Pay menu under the Payments dropdown.
- If there are exception item(s) listed under To Decision, this means a check that was not in your upload file is trying to post to your account, or the information on the check presented does not match your upload file.
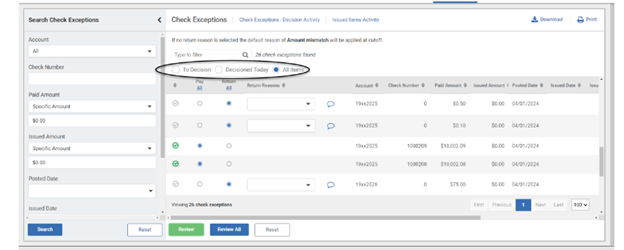
- After reviewing the Details of the exception item, or viewing an image of the presented check, choose Pay or Return for each item, then click Review.
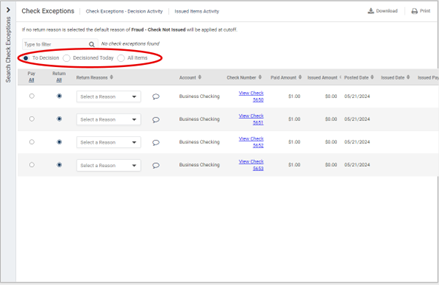
NOTE: If you are returning an item, you may select a Return Reason from the dropdown menu.
- Review your decision for each item and select Confirm Decisions to save.
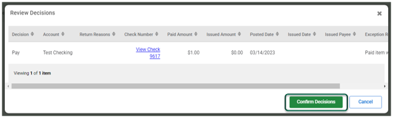
NOTE: You can re-decision a check exception as many times as needed BEFORE 12:00 PM, and you will see the decision history under Details. At 12:00 PM the exception will move to the Check Exceptions – Decision Activity List.
- To review items that have already been decisioned for the day, select Decisioned Today.
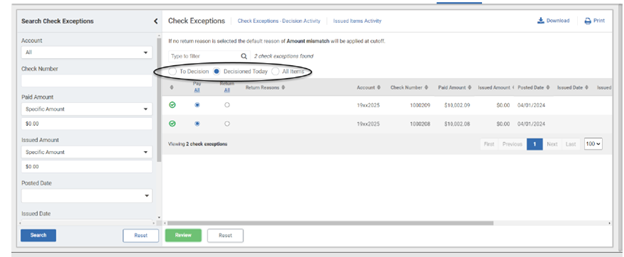
- To review all items that were presented for the day (to decision and decisioned), select All Items. Those with a green check mark have been decisioned already but may be re-decisioned until 12:00 PM.
Select Check Exceptions - Decision Activity from the Positive Pay menu under the PAYMENTS dropdown to view all of your check exception decision activity.