Resources
{beginAccordion}
Online Banking Guides
{openTab}
{endAccordion}
Customer Support
Commercial Banking Support
(833) 325-7902
Dashboard
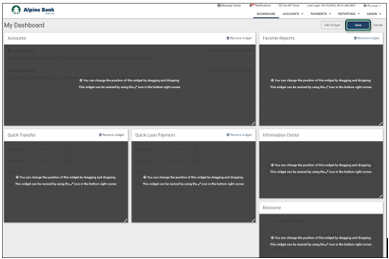
My Dashboard is a customizable landing page that provides quick access to your accounts, as well as additional functions including transfers, payment approvals, reports and more.

{beginAccordion}
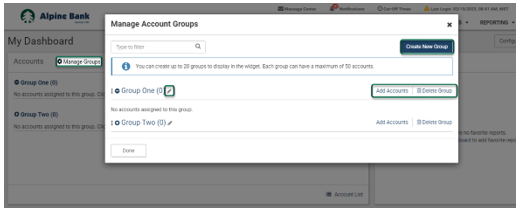
ACCOUNTS WIDGET
Your business accounts can be organized in groups to fit your business preferences. When you log in to your online account the first time, you will set up groups and add accounts accordingly.
- Click Manage Groups within the Accounts widget.
- From the Manage Account Groups pop-up, you can create up to 20 groups by clicking Create New Group.
- Add accounts to each group by clicking Add Accounts.
- You can rename an existing group by clicking the pencil icon
 next to the current group name.
- You can delete a group by clicking
 . *This does not delete the account(s) from your online account, it just deletes the group.
- Click Done.
CONFIGURING YOUR DASHBOARD
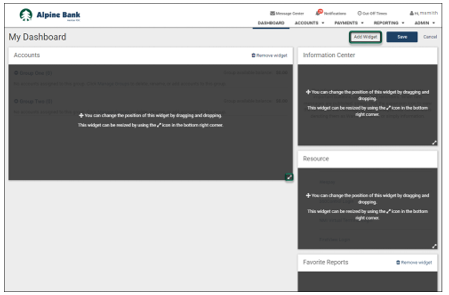
My Dashboard is divided into sections (also known as widgets) that can be added, removed, resized and reorganized according to your preferences. When you first log in to Treasury Management Online, you will configure your dashboard following these steps:
- Click on Configure Dashboard on the top right corner of your dashboard.
- You can change the position of the widgets by dragging and dropping them around the screen. You may also resize the widgets by using the
 icon on the bottom right corner.
- Add additional widgets by clicking Add Widget in the top right corner.
- Select the widget(s) that you would like to add to your dashboard by clicking Add Widget. Once you have selected all the widgets you would like to add, click Add Widgets to finalize your selection.
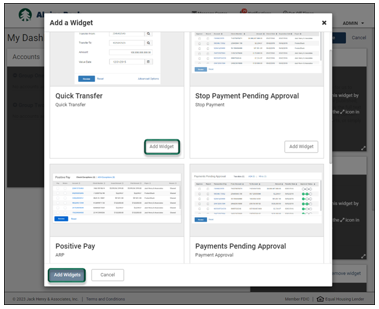
- Configure the size and position of the new widgets and click Save to set your dashboard preferences.